
Views: 0 Author: Site Editor Publish Time: 2026-03-17 Origin: Site
Transforming a simple bunch of flowers into a professional, high-value bouquet is an art form, and the secret lies in the wrap. Tissue paper is the industry standard for a reason; it adds volume, introduces texture, and creates a premium feel that delights the recipient. Moving beyond basic wrapping techniques allows florists to "sculpt" with paper, enhancing the visual appeal and increasing the perceived value of any floral arrangement. Mastering this skill is about more than just aesthetics. It’s about creating a durable, moisture-resistant, and striking package that protects the blooms during transport and elevates the entire gifting experience. This guide will walk you through the professional methods, from selecting the right materials to executing advanced folding techniques, ensuring every bouquet you create looks exceptional and survives the journey from your shop to its new home.
Material Choice Matters: Why MF (Machine Finished) tissue paper is superior to standard gift tissue for floral use.
Hydration is Critical: The "Wet-Pack" method to prevent paper wilting and flower dehydration.
Layering for Depth: Using multi-sheet techniques to create professional "ruffles" and structural support.
Sustainability: Transitioning to eco-friendly, biodegradable tissue options without sacrificing luxury.
The foundation of any stunning bouquet wrap is the paper itself. Not all tissue papers are created equal, and for professional floristry, the distinction between different types is crucial for both presentation and preservation. Choosing the right material ensures your creations look luxurious and hold up against the rigors of handling and hydration.
In the world of professional paper, two terms you'll often encounter are MF (Machine Finished) and MG (Machine Glazed). While they may sound similar, their properties are distinctly different. MG paper has a shiny, glazed side and is often used for general gift wrapping. However, for floral arrangements, MF tissue paper is the superior choice. It has a consistent matte finish on both sides, which gives it a more elegant, high-end appearance. More importantly, MF paper possesses greater tensile strength, especially when it becomes slightly damp—a common occurrence when working with fresh flowers. This durability prevents the paper from disintegrating or tearing easily, preserving the integrity of your wrap.
| Feature | MF (Machine Finished) Tissue | MG (Machine Glazed) Tissue |
|---|---|---|
| Finish | Matte on both sides | Shiny on one side, dull on the other |
| Strength When Damp | Higher; more resistant to moisture | Lower; prone to tearing and wilting |
| Best Use Case | Professional floristry, luxury packaging | General gift wrap, crafts |
| Aesthetic | Elegant, premium, non-reflective | Standard, glossy, reflective |
GSM, or Grams per Square Meter, is the standard measurement for paper weight and density. For bouquet wrapping, the ideal GSM typically falls between 14 and 20. This range offers the perfect balance: it's lightweight enough to be easily folded and pleated into elegant ruffles, yet it's substantial enough to resist tearing during the wrapping process. A paper that is too thin (below 14 GSM) will lack structural integrity and may become transparent when wet. Conversely, a paper that is too thick (above 20 GSM) can be stiff and difficult to manipulate, resulting in a bulky, less refined look.
Today's consumers are increasingly environmentally conscious, and your choice of packaging can be a powerful brand statement. Opting for Eco-Friendly MF Tissue Paper for Multiple Uses is not just a sustainable choice but a smart business decision. These papers are often made from recycled materials, are biodegradable, and may carry certifications like those from the Forest Stewardship Council (FSC). Highlighting your use of sustainable materials can attract and retain customers who value eco-friendly practices, creating a positive return on investment that extends beyond simple material cost.
One of the most critical properties of floral tissue paper is color fastness. You must use paper that is "bleed-resistant." When tissue paper comes into contact with moisture from the flower stems, non-fast dyes can bleed, staining the delicate petals, the customer's hands, or their clothing. This can ruin the recipient's experience and reflect poorly on your brand's quality standards. Always source your paper from reputable suppliers who guarantee their products are color-fast to prevent this professional pitfall.
Before you make the first fold, professional florists know that preparation is key to a flawless final product. A well-prepared bouquet not only looks better but also lasts longer and is easier to wrap. This "pro-prep" checklist ensures every component is ready for assembly.
Proper stem conditioning is the first step. Begin by stripping all lower foliage and thorns from the stems. This creates a clean "handle" or grip point for wrapping and carrying. More importantly, removing leaves that would sit below the water line (or within the wrap) prevents the growth of bacteria, which can clog the stems' vascular systems and shorten the life of the flowers. After stripping, give the stems a fresh, angled cut with sharp shears to maximize water absorption.
The biggest challenge in using tissue paper is protecting it from water. A crucial step is creating a hydration barrier. After conditioning the stems, wrap the very bottom portion (the part that has been in water) with a small square of cellophane or a compostable plastic alternative. You can even use a small, water-soaked cotton ball or paper towel wrapped in this barrier to create a mini-reservoir. This "wet-pack" method keeps the stems hydrated while preventing any moisture from seeping into and weakening the decorative tissue wrapping paper.
Having the right tools on hand makes the wrapping process smooth and efficient. Your essential toolkit should include:
High-Tensile Floral Tape: This stretchy, self-sealing tape is perfect for binding stems together securely without causing damage. It's often used at the main binding point.
Sharp Shears or Floral Knife: For clean, precise cuts on stems and trimming paper. Dull blades can crush stems, inhibiting water uptake.
-
Essential for creating "invisible" seams and securing folds without the clumsy look of regular tape.
Ribbon or Twine: For the final decorative flourish and to secure the wrap at the grip point.
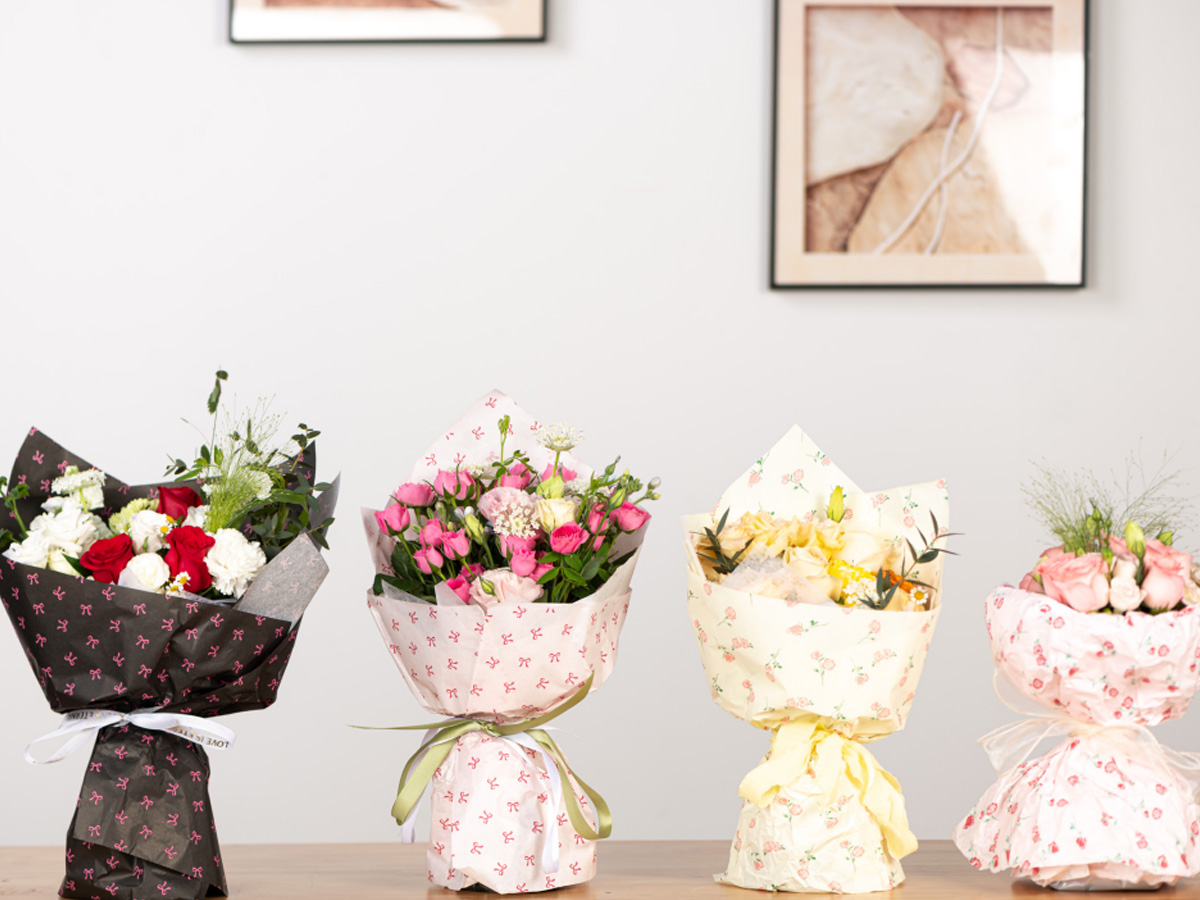
Before you begin wrapping, you must decide on the style of the bouquet. Is it a "front-facing" arrangement, designed to be viewed from one primary angle? Or is it an "all-around" bouquet, meant to be beautiful from every vantage point? This decision dictates how you arrange the flowers and how you will position and fold the paper. A front-facing bouquet often has a taller "peak" of paper at the back for a dramatic backdrop, while an all-around bouquet requires a more symmetrical, collar-like wrap.
The "Fan & Fold" is a versatile and popular technique used by florists to create a voluminous, professional-looking wrap. It provides excellent support for the flower heads and adds a beautiful ruffled texture. Here’s how to master it.
The Foundation Layer: Start with at least two to three large sheets of tissue paper. Stagger them on a flat surface so their corners are offset. Place your prepared bouquet onto the paper at a 45-degree angle. The top corner of the paper should extend well above the tallest flower heads; this will create the signature "peak" at the back of a front-facing bouquet.
Creating Volume (The Pleating Method): Gently bring one side of the paper up and around the bouquet. As you do, create accordion-like folds or pleats in the paper. This isn't about wrapping tightly but about gathering the paper to build a soft, ruffled "collar" around the flowers. This pleated structure provides crucial support for heavier blooms like hydrangeas or peonies, preventing them from drooping.
Securing the Core: Once you've pleated both sides around the bouquet, identify the "binding point"—the natural place where you would hold the bouquet, typically just below the lowest blooms. Cinch the paper firmly at this point. Use floral tape or a strong piece of twine to secure it tightly, ensuring you don't crush the delicate stems inside. The paper above the binding point should be full and ruffled, while the paper below should form a neat handle.
The Double-Wrap Strategy: To achieve a high-end, layered look, consider a double-wrap. You can use contrasting colors of tissue paper for a vibrant effect or pair an inner layer of Eco-Friendly MF Tissue Paper for Multiple Uses with an outer layer of a different material, like rustic Kraft paper or elegant cellophane. This not only adds visual depth but also provides extra structural support and moisture protection.
Final Flourish: The final step is to cover the binding point with a decorative element. Tie a beautiful satin or grosgrain ribbon into a crisp bow, or use natural jute twine for a more organic feel. This not only hides the mechanics (the tape or twine) but also provides a comfortable and ergonomic grip point for the recipient.
Once you've mastered the basics, you can explore more advanced techniques to differentiate your brand and justify premium pricing. These styles transform a simple bouquet into a bespoke floral gift, showcasing your artistry and offering unique flower bouquet wrapping ideas to your clients.
This minimalist, sleek style is perfect for long-stemmed flowers like roses, calla lilies, or tulips. It involves folding the paper into sharp, clean lines that overlap in the front, reminiscent of a traditional kimono. The focus is on precision and elegance rather than ruffles and volume. Typically, a single sheet of high-quality, often dark or metallic-toned paper is used. The stems are left partially exposed at the bottom, creating a modern and sophisticated silhouette.
For romantic and delicate blooms like peonies, garden roses, or ranunculus, the "Cloud" effect creates a soft, ethereal border. This technique involves using multiple layers of very lightweight tissue paper. Before wrapping, each sheet is gently crumpled and then partially smoothed out. When layered around the bouquet, the subtle wrinkles create a diffused, cloud-like texture that perfectly complements the soft petals of the flowers. It’s a time-intensive method that produces a truly luxurious and dreamy result.
Wrapping a single, perfect flower requires a special touch. The goal is to make one bloom feel as significant as a full bouquet. This is often requested for corporate events, weddings, or as a simple, elegant gesture. Use a small square of tissue paper and a piece of cellophane to create a conical wrap that cradles the flower head. The key is minimalism and high-quality materials. A simple ribbon tied at the base completes the look, providing maximum impact with minimal materials.
A professional florist thinks like a designer, matching the packaging to the product. Develop a decision framework for your paper color palettes based on the season and the floral varieties.
Spring: Pair pastel pinks, lavenders, and mint greens with tulips, daffodils, and hyacinths.
Summer: Use vibrant, bold colors like coral, turquoise, and sunny yellow to complement sunflowers, zinnias, and dahlias.
Autumn: Choose rich, earthy tones like rust, mustard, olive green, and deep burgundy for arrangements with chrysanthemums, berries, and fall foliage.
Winter: Opt for jewel tones like emerald green, sapphire blue, and ruby red, or go with classic whites, silvers, and golds for holiday bouquets.
Even with the best materials and techniques, things can go wrong. Being aware of common pitfalls is the key to consistently delivering a professional product. Here are some critical risks to manage.
The "soggy bottom" is the ultimate enemy of a beautifully wrapped bouquet. It happens when water from the stems leaks through the wrap, causing the tissue to disintegrate, colors to bleed, and the entire package to look messy and unprofessional. This ruins the unboxing experience. The hydration barrier discussed in the preparation phase is your primary defense. Always ensure your cellophane or compostable plastic layer is secure and provides complete coverage for the wet stem ends.
While tissue paper adds volume and value, it should never overshadow the flowers themselves. A common mistake is "burying" the bouquet in too much paper. As a rule of thumb, strive for a 70/30 visual ratio: 70% of the visual impact should come from the flowers, and 30% from the wrapping. The paper is a frame, not the main picture. Step back and assess the bouquet from a distance to ensure the proportions are balanced and the flowers remain the star of the show.
A wrap must be more than just beautiful; it must be functional. Consider the journey the bouquet will take. Will it be transported in a delivery vehicle? Does it need to stand upright in a water bucket at a retail location? Your wrapping technique must provide enough structural support to protect the blooms from being crushed. The pleated collar of the "Fan & Fold" technique is excellent for this, as it creates a protective buffer around the flower heads.
As a business, you must balance luxurious presentation with your bottom line. Every sheet of paper, every inch of ribbon, adds to your cost per unit. While premium packaging can command a higher price, excessive waste can eat into your profit margins. Develop standardized wrapping procedures for different bouquet sizes to control material usage. Analyze whether advanced, time-consuming wraps are justified by the price point of the order. Efficiently using materials without sacrificing quality is a hallmark of a professional, profitable florist.
Mastering the art of wrapping a bouquet is a journey from simple decoration to thoughtful engineering. The tissue paper you choose is not just an aesthetic flourish; it's a structural tool that supports, protects, and enhances the value of your floral creations. By understanding the nuances of paper quality, meticulous preparation, and proven techniques, you can ensure every bouquet leaves your hands looking professional and polished. Embracing the shift toward sustainable materials, like Eco-Friendly MF Tissue Paper, further distinguishes your brand as one that values both beauty and responsibility. The next step is to practice. Experiment with different colors, textures, and layering combinations to develop a signature wrapping style that becomes an unforgettable part of your brand's identity.
A: It's not recommended for professional results. Standard gift tissue is often MG (Machine Glazed), which is weaker and more prone to tearing when damp. It also has a higher risk of color bleeding, which can stain the flowers. Professional MF (Machine Finished) floral tissue is stronger and designed to be color-fast.
A: The key is a hydration barrier. Before wrapping with tissue, wrap the bottom 2-3 inches of the stems with a small piece of cellophane or compostable plastic. This "wet-pack" method contains the moisture at the stem ends and prevents it from seeping into and damaging the decorative paper wrap.
A: For a professional, voluminous look, florists typically use between 3 to 5 sheets of standard-sized (e.g., 20x30 inch) tissue paper for a medium-sized bouquet. Layering multiple sheets adds depth, structural support, and creates the desired ruffled effect around the blooms.
A: Many MF tissue papers are an excellent eco-friendly choice. Look for options that are made from recycled content, are certified by the Forest Stewardship Council (FSC), and are biodegradable or compostable. Sourcing from suppliers who prioritize sustainability ensures your packaging aligns with green values.
A: To avoid visible tape, use double-sided adhesive dots or tape on the inside of the folds to secure them invisibly. The primary method, however, is the "tuck and tie." Gather the paper securely at the binding point and tie it tightly with twine or floral tape, which will then be covered by a decorative ribbon.


